By , March 23, 2011 5:38 pm


The Foggy Future
The Foggy Future

June 30th, 2011 is effectively “T” minus 0.  The last day of work for both Ashley and I.  It’ll be a big day.  For the first time since high school, I will be without work or classes.  We’ll both receive our last paycheck, marking the full height of our travel funds.

It probably won’t be the day we leave on our RTW trip, but it may be.

Oh, and it’s 99 days from today.

By , March 14, 2011 12:01 am

Happy Pi Day everyone! There’s no better way to celebrate Pi Day then a nice slice of pie.  So if you want to stop reading and go get yourself one, I’ll wait.

Pi Pie

Pi Pie

Got your pie?  With a little “mode” I hope?  Great!  Let’s continue…

In case you didn’t know, Pi Day is a holiday commemorating the mathematical constant, pi, and is celebrated each year on March 14 (3/14 in month/day format).  It’s a big day in the math world and, since I am a self-declared math geek and a math teacher, it’s an important day in my world.

It also happens to be our cat’s birthday.  And she just happens to be named Pi (short for Pythagoras).  No, I’m not kidding about this… I really am such a big math geek that I named my cat after a famous mathematician.

Our Cat, Pythagoras (a.k.a. Pi)

Our Cat, Pythagoras (a.k.a. Pi)

Pi Day seems like the perfect opportunity to talk about one of our biggest obstacles in planning our trip – finding a good home for Pi while we are away.  We’ve had her since the summer we were married (nearly four years now) and she’s truly become part of the family.  As soon as we started debating the possibility of this trip, we started brainstorming people that might want to look after Pi.   The Humane Society was not an option we wanted to entertain.  If we wanted to do this thing, we needed to find a good home for her.

We asked several family members and friends, but no one wanted another cat.  Finally, one of my coworkers offered to take her in.  Thanks, Lana!  Pi will have lots of adjustments to make though – she will be moving from our quiet little house to one with three kids, two dogs, and another cat.  But she should be happy there.  The family loves animals and will treat her well.

Finding someone to take care of your pets while you are away on a lengthy trip is a big deal.  It is a decision that is worth a lot of time and thought, and it is an essential factor to consider when deciding whether or not you can make an RTW trip work.


By , March 10, 2011 5:50 pm

In an effort to be as prepared as possible for our big RTW, we decided to book ourselves a pre-RTW vacation in Las Vegas. I know what your thinking, “What? Did I read that right, you’re going on a pre-RTW trip? Who does that? Can’t you handle 4 more months of work? You should really be working on those travel funds!”

Unfortunately for you, you’re wrong. Now is the perfect time to spend some of those travel funds. No, not because we really need a vacation, but because our friends Scott and Tamara, pictured below, are getting married. Congratulations guys! Being the good friends we are, we booked flights and hotels and are all set to meet up with them on their special day… plus a few days before.

Tamara & Scott on our couch

As the title of this post suggests, booking this trip allowed us to practice buying tickets the way we would for our actual trip. Well, maybe we won’t be booking return flights. And, maybe we would have more flexibility in our schedule on the big trip. Otherwise, it’s pretty much the same idea.

Starting out, we knew that the wedding was on the 7th of June, a Tuesday. We also knew that Ashley was only entitled to 3 days vacation and, to make the most of it, we would want to leave sometime on the weekend before.

Flights

I searched the web long and hard looking for the cheapest flights. I could rattle off a half dozen websites that we used, but I’m not going to. I’m just going to give you what we found to be the best. http://www.farecompare.com/

Here’s why it’s the best:

My dates are flexible
Selecting this option will allow you to quickly search different departure dates. When we first started into this, we were looking to leave on Sunday June 5th and return Wednesday June 8th. After a quick look at the price calendar, we discovered that we could save $40 ($20 each) by leaving 1 day earlier. That was enough to pay for our hotel room that night, effectively giving us a free extra day on our pre-RTW vacation.  If we had more flexibility, we could have saved a bit more by travelling later in the week, or a bunch more by taking off a month prior.

FareCompare My dates are flexible

FareCompare My dates are flexible

FareCompare Flexible Dates Calendar

FareCompare Flexible Dates Calendar

Taxes are included in all quotes
I don’t know about you, but I prefer to compare apples to apples. Sorting all flights by prices that include all fees and taxes sure beats the heck out the way most sites do it: hiding the extra fees until you click to book.

The prices it found were the cheapest
I could find the same price on other websites, but I couldn’t find anything cheaper including the airline’s website.

They have this awesome map
I like this map. It shows you how much flights cost from your location to anywhere else. This is going to be a great tool for planning out several legs of a longer multi-city trip. You’re right, we didn’t use it to book this trip, but it is still cool.

FareCompare Travel Map

FareCompare Travel Map

The bad:

There’s always a catch. When you make your first search, FareCompare forces you to open up 3 additional browsers to view the same search on other travel sites like Oribtz and Expedia. No matter how you slice it, you are going to have 5 open browsers when you use this website.  Not the end of the world, but certainly an annoyance.

I assume this is how FareCompare makes its money, by advertising and referring you to the other major travel search engines. Fortunately I found this could be avoided. First, click the When-to-Fly link at the top of the page, then click the Search Flights link. Or, simply click here.

TD Travel Rewards

I should point out  that despite the long rave review above, we did not use farecompare.com to actually book our tickets. Once we found the cheapest flight on the day we wanted, we headed over to our VISA’s website to make the actual booking. Why? Because we earn points that can be redeemed to offset future travel at a rate of 4.5% when we book directly through the TD Travel Rewards website.  Booking through FareCompare would only get us the standard rate of 1.5%. In case you are wondering, we are using the TD Travel VISA we told you about earlier in our banking post.

This process went smoothly. We were able to find the same flight at the same price FareCompare had. We were even able to cash in $100 worth of points we had already saved reducing the cost of our booking.

I’m glad we made this practice run now.  At the end of the booking process there was a small note indicating that we would receive our booking confirmation with 48 hours. We didn’t have to wait that long, but we did wait a full 24 hours before we received the first bit of email correspondence.

Because of this rather long wait for any sort of confirmation, I did some more research and found this statement:

“Advance booking times are dependent on a number of factors including what you book. We recommend that you book at least 14 days in advance. However, we can usually accommodate bookings within 48 hours of your departure time.”

Yikes, 14 days! I’m sure glad I found this out now. I would hate to have learned that lesson the hard way; sitting in the airport as our plane flies off wondering “why the heck didn’t they send out our booking, it’s been 12 hours?”

So there you have it, our flight finding/booking process. We’d love to hear any suggestions on how you find cheap flights. The cheaper we can find the better.

P.S. Please don’t post way cheaper flight deals to Las Vegas from Regina.  Our tickets are non-refundable, and it will make us feel bad.  Thanks.

By , February 28, 2011 6:09 pm

Amazing how time can sneak up on you. Thanks to Shane at The Working Traveller I was abruptly reminded that March 1st, 2011 is exactly 1 year after Ashley and I decided to travel the world.  It may also be of interest to some that March 1st, 2011 is also the first day of Breakaway Backpacker’s RTW trip!

Wow, we’ve had a whole year to prepare for and plan our trip already. What’s more, there’s only 4 months left before we will be homeless, unemployed, and embarking on our long anticipated journey!

So, how has the preparation been going? Umm, it’s been going okay, maybe even good. As luck would have it, just today I came across this guest post by Jack and Jill at Don’t Ever Look Back. Just for fun, let’s compare how we stack up to their list.

Time until departure: 1 year or more

Initial research – Done

  • We plan on selling our house – we have our house up for sale this very moment.
  • We’ll be quitting our jobs to travel – at first we wanted to take a year off from work, but our employers didn’t cooperate.

Create a budget – Done

  • We went about this in sort of a screwball fashion, we looked at how much we could save by July, and decided that was a good enough number for our travel funds.

Start paying off or reducing your debt – Done

Reduce the number of commitments – Work in Progress (WIP)

  • Ashley has a cellular telephone contract that we will have to buy out, and a gym membership that expires shortly.
  • Otherwise, We reduced our satellite TV bill considerably, and I cancelled my gym membership to save a few extra $$.

Visit the local library and start researching places that interest you. Read travel journals, magazines, and books (can I recommend Bill Bryson?) and other blogs to inspire you. – Done

  • I’m following a bunch of travel blogs, twittering, and reading travel books on a daily basis. If anything, I’ve gone too far on this one.

Make (a very long) list of countries you want to visit. Do a brain dump and just start writing them down. – Done

  • One of the first things Ashley and I did was to purchase a world map for our wall. As we read more about places we’d like to go, we add pins to the map.

Time until departure: 6 months – 1 year

Narrow down your itinerary list – WIP

  • I don’t think we’ll ever have a proper itinerary. What we are working on now is a joint “bucket list” for our trip.  Right now we are preparing our personal lists.  Next step will be to meld them together and figure out a way to fit them into our rough travel plans.

Research what vaccinations you’ll need – Done

  • You can check our our research here.  We still have a few more to get, but we are well on our way.

Start connecting with other travelers – Done

  • We have the blog up and running and have been working out the kinks.  Mike is working on his comma splices and spelling mistakes.
  • We were also lucky enough to meet a local couple who are planning their own RTW.
  • And, we  signed up for Couch Surfing.  We would be happy to meet some travelers by hosting them before we go.

Take an honest look at your budget. Have you been meeting your monthly savings goal? – So far, So good

  • As of February 28th, we are on track to reach our savings goals.  We even cut our monthly budget another $120 to compensate for a bill we received in January after our car was in a hit and run accident.

Time until departure: 4 months

Decide on whether you’ll get a round-the-world ticket or point-to-point tickets. – Done

  • Point-to-point tickets for us.

Check the expiration date on your passport. Renew if necessary. – Not Done

Take advantage of your work insurance. -Not Done

Start researching travel insurance – WIP

Sell stuff – WIP

  • We’ve been hard at work becoming unfettered since December. Slowly but surely, we’ve been making progress.
  • I’m fairly certain that we’ll still need some garage sales this spring.
  • And we still will have a car for sale.

So, there you have it, I think we are doing okay.  As long as our house sells before July, we’ll be in great shape for our trip.  12 months down, and 4 more to go, I can safely say I’m excited… maybe even obsessed.

By , February 23, 2011 7:35 pm

You may be interested in reading Part 1 if you haven’t done so already.

Yukon River Whitehorse to Dawson City 736km


View Yukon River in a larger map

In the late spring of 1898, along the shores of several small, high mountain lakes in northern British Columbia, an estimated 30,000 people watched captivated, as the decaying ice floes heaved, crashed and groaned and finally gave way to disappear into the northern summer.  This break up, perhaps the most celebrated arrival of a northern spring ever, triggered the frantic departure of a motley armada of more than seven thousand water craft, carrying an estimated thirty million pounds of goods and equipment, as they embarked on the final 600 mile leg of a northern odyssey to the gold creeks of the Klondike in what can only be described as the most famous gold rush in history — Exploring the Upper Yukon River, Gus Karpes, 1995

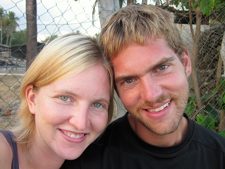
Ashley, Jane and Deanna (Jananna), and myself followed in the wake of those early gold miners in July 2010.  We timed our trip to arrive in Dawson City just in time for the Dawson City Music Festival.  The whole trip was a great experience – so good, in fact, that Ashley and I have been talking about repeating it this summer to kick off our around the world travels.

Distance and Difficulty

In total, the four of us spent 14 days on the river.  During that time we paddled/floated 736km starting in Whitehorse and ending in Dawson City.  If you are looking for a shorter trip, it is possible to start at Carmacks, leaving only 416 km between you and Dawson City.

This was my first canoe trip, and I would recommend it for any beginner.

Portages – There were no portages!  That’s right, no need to carry your canoe around waterfalls or rapids.

River Speed – The river flows quite quickly, with the exception of Lake Laberge where it does not flow at all.  You can expect currents to carry you anywhere from 5-11km/hr.  If you are not a strong paddler, don’t worry.  Spend about 6.5 hours a day floating and you’ll make it where you need to go.  It’s possible to complete this trip in much less time than we did.  To give you an idea, the winners of the 2010 Yukon River Quest made the same trip in only 42 hours and 48 minutes.

Lake Laberge – Deserves special mention.  This will be the hardest and most dangerous part of the trip.  The lake is 30 miles long and is prone to bad weather.  Our first night on the lake, a storm came up while we had stopped to prepare supper.  It took only a minute or so for the water to go from absolute calm to three foot waves.  If we were caught out in the middle of the lake we would have been in big trouble.  It’s important to stay close to shore.

Storm rolling in on Lake Laberge

Rapids – There were two rapids shortly after Carmacks: the Five Finger Rapids, followed by the Rink Rapids.  They were short and easily traversed.

Five Finger Rapids

Rink Rapids

Transportation

We drove to Whitehorse along the Alaska Highway.  The highway was in good condition, and paved the entire way.  Our small Civic had no problems getting us where we needed to go.

The scenery was flat and Saskatchewan-like for the first 1,400 kilometres to Dawson Creek, British Columbia.  That stretch was a long boring drive.  After Dawson Creek, the remainder of our drive through beautiful British Columbia and the Yukon was stunningly gorgeous.

Some of my favourite photos from the entire trip came from Stone Mountain Provincial Park where we did some day hiking and spent the night.  Another beautiful area was near Muncho Lake in BC.

View from the top of the trail at Summit Lake Campground, Stone Mountain Provincial Park, BC

We also stopped a while in Watson Lake, Yukon to check out the famous Sign Post Forest.  Supposedly this was the location of the first signpost showing distances and directions to major world cities.  Since then, Watson Lake has allowed anyone to contribute their own sign to the collection and they now have thousands of signs hung up on display.  We didn’t have a sign with us, but if we drive by here again, we’ll be sure to bring one.   All totalled, we logged 2,824km by car over 3 days getting to Whitehorse. Jananna flew into Whitehorse directly.

Sign Post Forest, Watson Lake, Yukon

Obviously we took a canoe from Whitehorse to Dawson City.  Getting back to Whitehorse we booked a flight through Air North for about $150 each.  Although there is a highway connecting Dawson City to Whitehorse, there is no public transportation between the two, and chartered van rides cost as much as air tickets.

Because we were in Dawson City for the music festival, in retrospect, we should have hitchhiked from Dawson City back to Whitehorse and saved the $150.  Within  minutes of attending the festival, we met several people from Whitehorse who offered to give us rides after the festival. Many people also offered to take our gear back to Whitehorse so we could avoid overweight baggage charges on our flight.

Guide Books

We took two different guide books with us on the river.

Yukon River (Marsh Lake-Dawson City) by Mike Rourke.  The maps were to scale, and very well detailed.  Potential campsites were marked, and there was information on a few hikes adjacent to the river.  If you are only bringing one guide book, this is the one we recommend.

Exploring the Upper Yukon River by Gus Karpes.  Ths guide book came in two parts.  It contained hand drawn maps as used by the steam ships over 100 years ago.  These maps were fine in some areas, and unrecognizable in others.  I would not rely on them as my only set up maps.  On the other hand, the books were filled with stories about the river and identified historically significant sites.

Outfitters/Canoe Rental

We rented our Canoe from the Kanoe People for $425.  This included a $75 drop fee so we could return the canoe in Dawson City.  We also rented some bear spray and a food barrel.  Because we drove to Whitehorse, we needed a parking spot.  The Kanoe People let us park in their back yard for $25.  All in all, the experience with the Kanoe People was positive and I would recommend them again.

Up North Adventures are the other outfitter in Whitehorse.  I have no idea how they compare to the Kanoe People, as we did not go inside.

Another alternative would be to rent a canoe from Dieter at the Dawson City River Hostel.  I believe this is the cheapest option for a canoe rental.  Since you’ll probably be staying at the Hostel when you get to Dawson City, it’s no extra effort to return the canoe.

Packing

Here’s our gear list for the trip.  We borrowed large dry sacks from friends, and highly recommend them.  The rest of the stuff we more or less owned already.

Clothing

*cotton should be avoided at all times*

  • base layer-top and bottom (long johns)
  • socks 5x
  • underwear (no cotton) 5x
  • t-shirt 3x
  • full sleeved shirt 2x
  • pants 3x
  • fleece
  • sweater 2x
  • gloves and/or mittens
  • tuque
  • rain gear – jacket and pants
  • shorts or bathing suit
  • hat

Hygiene

  • scentless deodorant
  • tooth brush and toothpaste
  • towel
  • biodegradable soap
  • toilet paper
  • trowel
  • sunscreen
  • bug spray

Other

  • maps and route info
  • water bottles (at least 3 litres)
  • sunglasses with attachable string
  • head lamp with extra batteries
  • log book and pencil
  • dry sacks for gear
  • shoes-camp
  • sandals-canoe
  • glasses or contacts
  • watch
  • compass and whistle
  • knife
  • sawvivor (collapsible saw)
  • camera

Cooking

  • stove
  • fuel
  • pots
  • cutlery
  • wash basin
  • dish cloth
  • dish soap and scrubber
  • food
  • food barrel
  • water filter/water purification drops
  • fire starting kit
  • matches and lighter

Sleeping

  • sleep mask
  • tent
  • sleeping bag
  • sleeping pad
  • rope

Paddling

  • pfds
  • paddles (with extra)
  • canoes
  • bailer
  • sponge

Repair Kit List

  • spare batteries
  • multi tool
  • shoe goo
  • buckles
  • duct tape
  • cord
  • diaper pins
  • velcro
  • thermarest repair kit
  • extra zipper
  • super glue
  • rubber bands
  • needle and thread
  • nylon patches
  • assorted sized screws and bolts

First Aid Kit

  • scissors
  • tweezers
  • band aids 24x
  • non-stick gauze
  • gloves
  • triangular bandage
  • safety pins
  • sterile gauze role
  • athletic tape
  • q tips
  • anti-septic wipes
  • moleskin
  • mini first aid booklet
  • razor
  • needle
  • matches and lighter
  • thermometer

Our Gear

Camping

Here’s the good news: camping is free along the river, just bring your own tent.  Between Whitehorse and Carmacks, camping spots are relatively plentiful along the river shoreline.  Many of them are well marked by branches that can be seen from the river.  All the ones we stayed at had flat spaces for tents and fire rings for cooking.  In addition, they were well treed.  Mosquitoes were an issue, but they were no worse than we are used to back home.  We tried to stay at sites marked potential good camping on Mike Rourke’s maps and were not disappointed.

Typical campsite before Carmacks

After Carmacks, there are far fewer treed camping sites, and the potential good camping marks on our maps disappeared. Instead look for sand bars on the upstream sides of the numerous islands.  They are flat, easy to find, and free from mosquitoes.

Mosquitoes

There were mosquitoes on shore.  On the river, they didn’t seem to bother us.  You want to have good bug spray with you, but I did not find the mosquitoes to be any worse then they are in my own back yard.  We were advised to bring bug nets to cover our faces, which we did,  but we did not use them once.

Drinking Water

The Yukon River is known to contain Beaver Fever, and it is advised that all drinking/cooking water be treated before use.    The river became progressively more silty as we approached Dawson City, so filling up at the mouth of clear creeks feeding into the river was the best option.  We stopped at creeks daily to fill up our water stores.

We treated the water using a filter and pump from MSR, while Jananna used a chlorine treatment system.  The chlorine system was a lot less work, but took a while to treat the water and left a chlorine taste behind.  The pump/filter system was a lot more work, but the water tasted good and was ready to drink immediately.  After two weeks on the river, none of us contracted any stomach bugs, so I guess both systems worked.

Taking turns filtering water from a well at Fort Selkirk

Food

We packed all of our own food for the entire two weeks with one exception: cheese.  We stopped at Carmacks on day 7 and purchase a block of low fat cheddar cheese.  Actually, two exceptions, we also split a hamburger at Carmacks for a completely unreasonable $20.

Here’s a link to our meal plan if you want to take a look at what we ate.

Bears

You’ll want to practice bear safety.  This means cooking and storing your food away from your campsites, and making noise when you approach shore.  Although there are plenty of bears, both Black and Grizzly, along this stretch of the river, bear attacks are rare.

In more that 25 years that I have spent on the rivers of Yukon.  I have never had a problem or had a serious incident involving bears nor has one been reported to us by all the people we have dealt with during this time.  — Exploring the Upper Yukon River, Gus Karpes, 1995

Fishing

You can purchase a fishing license for $15-$35 depending on your country of residence.  The most common fish are Arctic Grayling, Northern Pike (Jack Fish), and during certain times of the year Salmon.  I tried my hand at catching Arctic Grayling.  I had a fish on the first cast, and it did not take long to catch supper.

Fish on the first cast

That’s about all you need to know to arrange this trip for yourself.  In part 3, we’ll post our unabridged journal and some more photos.

By , February 16, 2011 6:40 pm

The Motherload of Budget Grocery Shopping - only 50 cents a meal

I grew up living on top of a grocery store.  Literally.  My parents owned a small town Saskatchewan grocery store with living quarters upstairs.  Grocery shopping as a kid consisted of running down stairs at supper time to pick up the ingredients mom required.  Anything we wanted was always on hand.

Needless to say, after I moved out there has been a gradual evolution of my grocery shopping habits.  When I first moved in with Mike, I drove him nuts trying to buy and keep on hand anything I might feel like for supper on any given day.  After I overcame that little compulsion, I developed fairly average grocery shopping skills – I didn’t go overboard on items, but I also didn’t pay too much attention to how much something I wanted cost.

After we made the decision to travel, there was yet another evolution – budget shopping.  Pretty much everything I buy now is on sale or somehow discounted.  Take last weekend’s grocery trip for example – I took full advantage of the 10 for $10 sale at my nearest Coop Marketplace.  I loaded up on boxes of pasta, bags of perogies, frozen chicken cordon bleus, canned meat, and nearly everything else I could get my hands on for $1.00 each.  All said and done, I ended up with 111 individual meals (or 55 meals for the two of us) for only $55.  Not too shabby.

What about when we feel the need to splurge?  Not a problem – consider Valentine’s Day.  In true Frugal February fashion, we forwent the fancy meal out and splurged at home – Veal Parmesan (for $1.25 a cutlet), homemade pasta (thanks to Mike), homemade tomato sauce (using canned tomatoes that were about $1.00 a can), and chocolate lava cakes.

I even got a box of Valentine’s chocolates – post V-day at 70% off, of course.

By , February 10, 2011 6:43 pm

fortune cookie

Frugal Fortune Cookie

Ashley and I have been celebrating Frugal February ever since the phrase was coined by Amy and Kieron over at Don’t Ever Look Back.  Like Amy and Kieron, we have been in ultra budget mode trying to scrimp and save every bit for our upcoming around the world trip.  After our car related financial setback in January, the timing couldn’t be better.

Naturally, to prepare ourselves for our very tight Frugal February budget, we ordered lunch at our favourite restaurant, the Gateway Cafe, located in downtown Qu’Appelle.  And naturally, we splurged.

We had delicious egg rolls, chicken balls, fried rice, ginger beef, and long dry ribs.  It was glorious.

That is of course, until the bill and fortune cookies arrived.

I think next time I’ll order my fortune cookie as an appetizer.  If I would have gotten this advice at the start of my meal, we probably could have gotten away with splitting a burger.  Of course “next time” will have to wait until Frugal March.